NodeMCU Basic Project-Blink an built-in LED
In this lesson,we will introduce how to blink the on-board LED and how to blink a external LED.
Hardware Preparation:
- NodeMCU x 1
- LED x 1
- 200 ohm resistor x 1
- Micro USB cable x 1
Software required:
- Software Arduino IDE(version 1.6.4+)
Follow the below Steps
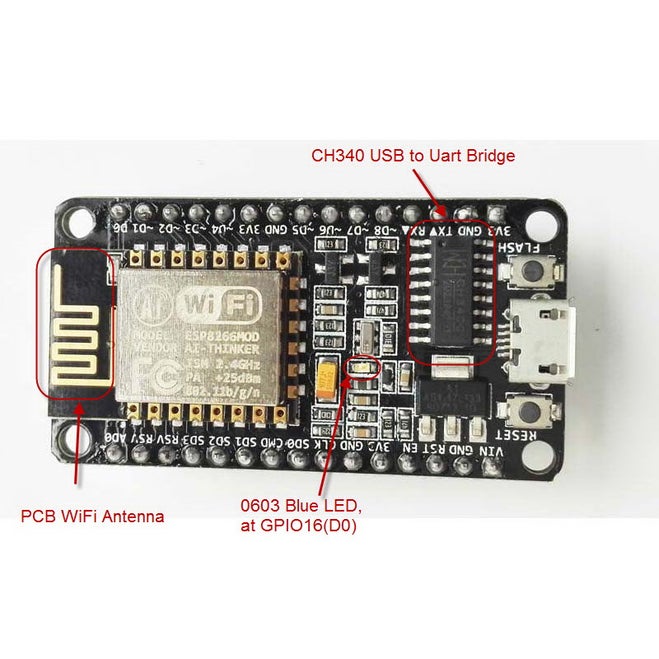
In this part,we will learn how to use the Arduino IDE to blink the on-board LED,the blue led in the board was used to signal the execution of a particular procedure.Because the GPIO16 (DO) limitation to use the analogWrite() and looking to see my LED doing something else…
First,connect the NodeMCU to the PC,put below code to the Arduino IDE:
#define LED D0 // Led in NodeMCU at pin GPIO16 (D0).
void setup() { pinMode(LED, OUTPUT); // LED pin as output. } void loop() { digitalWrite(LED, HIGH);// turn the LED off.(Note that LOW is the voltage level but actually //the LED is on; this is because it is acive low on the ESP8266. delay(1000); // wait for 1 second. digitalWrite(LED, LOW); // turn the LED on. delay(1000); // wait for 1 second. }
void setup() { pinMode(LED, OUTPUT); // LED pin as output. } void loop() { digitalWrite(LED, HIGH);// turn the LED off.(Note that LOW is the voltage level but actually //the LED is on; this is because it is acive low on the ESP8266. delay(1000); // wait for 1 second. digitalWrite(LED, LOW); // turn the LED on. delay(1000); // wait for 1 second. }
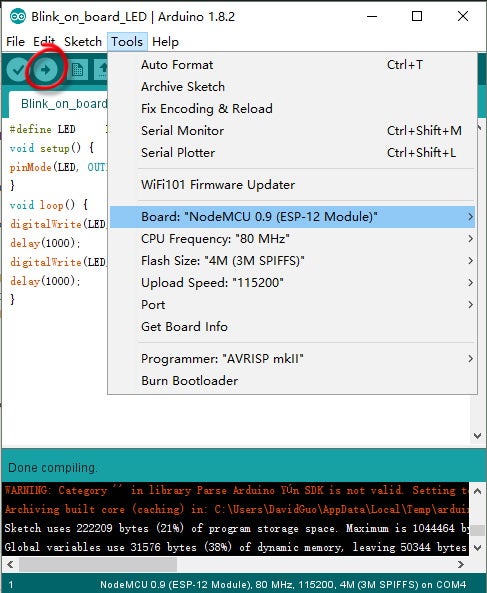
Then config the board settings(choose the corresponding board and port for your NodeMCU) and upload the sketch to the board.
After upload done,you will see the on-board LED blink every second.


Comments
Post a Comment